Congrats on registering your new Amazon Seller Central Account!
Now what?
You’re not alone if you feel intimidated by seller central’s online portal.
List Globally? B2B? Partner Networks?
What does it all mean?
What happens if your inventory becomes stranded? How can you request a customer review?
Registering your seller central account can lead to more questions than answers.
And trust me, this is the last thing you want, especially when you’re eager to start selling.
The following is a step-by-step guide to navigating seller central that will save you time and money when selling on Amazon FBA.
I’ll highlight useful features, as well as a few of my favorites.
Don’t forget to bookmark this page for future reference!
Home Screen Buttons

Marketplace
This button indicates which marketplaces you’re eligible to sell in.
If you’re an account holder from the U.S., Mexico, or Canada, you’ll have access to all three Amazon marketplaces upon registering.
Of course, this will be different depending on your nationality and the location you’re selling from.
However, you don’t have to be a U.S. citizen to sell in Amazon’s U.S. marketplace.
But what if you want to sell in the Japanese, or Australian marketplaces?
If you’re eligible, Amazon will guide you through an application process for selling globally, and potentially give you access to other marketplaces.
Open Orders
Open orders are for items that have been ordered by the customer but have not been shipped yet.
Products are considered ‘open’ until the orders have been fulfilled (or canceled).
If you’re selling through Amazon FBA (fulfillment by Amazon), you don’t have to worry about actually shipping the open order, as Amazon does this for you.
This is without a doubt my most preferred method,
However, if you’re selling through FBM (fulfilled by merchant), you’ll need to take action on these.
Today’s Sales
Here you’ll find your day’s sales volume.
Sales will be shown by each individual marketplace.
| Amazon Payments Dashboard Do you have questions about Amazon’s Payment Dashboard? Check out my full video tutorial here: |
Buyer Messages
In a scenario where a customer is not satisfied with your product and reaches out to you through Amazon’s buyer/seller messenger program, here is where you’ll find their messages.
I recommend checking this frequently.
Why?
You’ll notice two boxes labeled “Under 24-hour target,” and “Over 24-hour target”
This is Amazon’s way of proactively tracking your customer service.
Ideally, you want to answer any questions in inquiries in less than 24 hours.
Avoid taking longer than this, as Amazon will mark it as a late response on your metrics.
Definitely keep an eye on your messages, as failing to do so can be disastrous to your Amazon Seller Central account, especially if you’re just starting out and looking to gain momentum.
Buy Box Wins
If you’re selling via retail arbitrage, or if you’re selling an already existing item, buy box wins are vital to competing with others selling the same item or in the same niche.
Buy Box wins – or the tendency for the Amazon algorithm to promote your products – are based on your Amazon metrics, such as;
- On-Time Delivery Rate
- Late Shipment Rate
- Order Defect Rate
- Total Shipping Time
In short, this means Amazon rewards you for good customer service by promoting your products.
Alternatively, poor customer service can negatively impact product sales.
Total Balance
This is your balance after Amazon’s fees.
Otherwise put, this is the amount that will show up in your bank account.
Inventory Performance Index (IPI)
Amazon needs a way of determining how well sellers are managing their inventory.
Imagine this scenario.
A seller ships 1000 units into an Amazon warehouse but only sells 5% of stock over the next 6 months.
This takes up large amounts of valuable warehouse space, that could otherwise be used for better-selling products.
Amazon’s solution?
A system that punishes and rewards sellers for how well they manage their inventory. In this scenario Amazon gives you an IPI score index.
So what’s a good IPI score?
Generally speaking, anything about a score of 450 means good standing.
But what happens if you slip below this score? Well, you’ll lose the ability to send additional inventory to the warehouse.
Cards (Also Known as Widgets)

Cards will look different depending on your location, the time of year, and what type of data Amazon’s trying to gather.
But here are a few that I use most often.
News:
Amazon is constantly changing. And because staying up to date on the platform’s latest changes is paramount to sustaining profits, I tend to pay attention to what the news widget says.
For example, it’s not uncommon to find updates about fees, ads, and general seller guidelines. And while it might be tempting to skip over this section, there’s often vital information here that can impact your Amazon journey.
Being up to date with Amazon’s updates is a great way to stay ahead of the competition.
Seller Forums
I recommend reading through Amazon’s seller forums because you’ll find answers to real problems asked by real people.
Sure, there are tons of resources on Google and YouTube, but forums highlight specific problems or issues you might encounter selling on Amazon.
The posts are also wildly entertaining at times!
Adding Products on Amazon

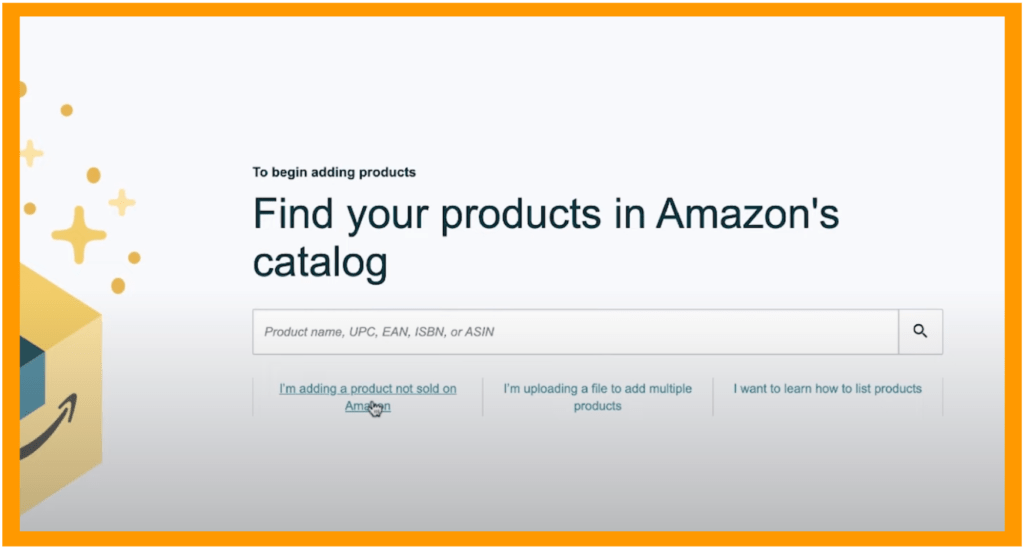
Product Name, UPC, EAN, ISBN, Or ASIN: Choose this option if you’re selling a product that already has a listing on Amazon, such as retail arbitrage, or wholesale.
I’m Adding a Product Not Sold on Amazon: Choose this if you’re adding new products to Amazon, such as from your own private brand.
For a full complete breakdown of The 12 Simple steps to listing a product on Amazon, click here.
Shipping Queue
What happens if my units expected are different from the units received?
A common scenario is that your products are damaged or broken during shipment. If this happens, you’ll be notified in the “Units Expected, Units Received” column.
The good news is that Amazon will reimburse you for the full price of the product.
Make sure to follow up on any inconsistencies here, and that you’re reimbursed appropriately. If Amazon somehow fails to reimburse you for lost or damaged items (which does happen), there’s a time limit to review the case and notify Amazon about discrepancies.
Sending Shipment To Amazon
On this screen is where you can input information when shipping products into Amazon’s warehouse.
You can access a video walkthrough on YouTube here, or a detailed blog about Amazon’s shipment procedures here.
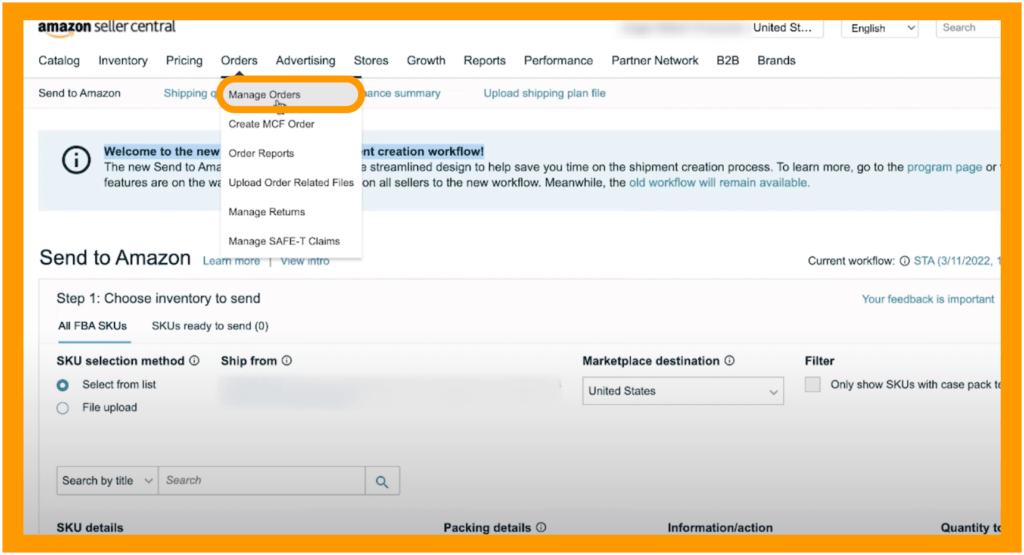
Manage Orders and Order Details

This is one of my favorite features on Amazon because it’s stacked full of tools, insights, and actionable steps that will make your selling journey easier.
For example, this tab displays:
- Customer name
- Date purchased
- Chosen shipping service
- Location of shipment
- Product Information
Additionally, it provides you with options to refund orders in case the customer is dissatisfied with the product.
Request a Review
Reviews are the lifeblood of your Amazon FBA store. Without good reviews, the likelihood of your product selling is low.
The good news is that if you source a high-quality product, test it, follow my guidelines about how to list a product on Amazon error-free, AND provide excellent customer service, over time you should see positive feedback.
Amazon will automatically prompt sellers to provide a review thirty days after ordering your product,
However, I recommend manually requesting a review 1-2 weeks after your products are purchased.
So why request a review manually?
I’ve discovered I get more positive reviews when I request them closer to the original purchase date.
If the customer is satisfied with the product, they’re more likely to leave a positive review when their product experience is fresh in their mind.
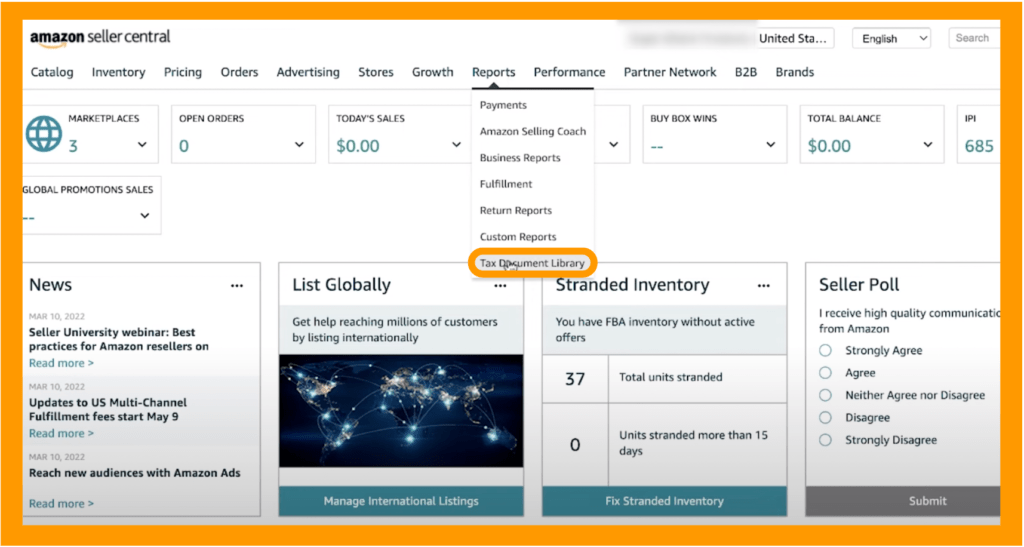
Accessing Tax Documents on Amazon
Tax documents can be found under reports, Tax Document Library

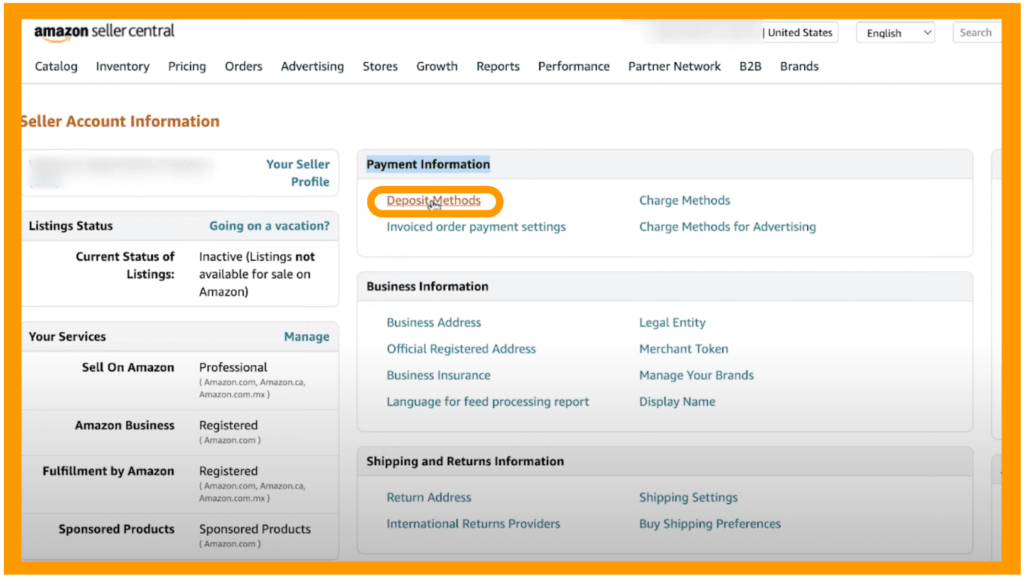
Amazon Seller Account Information
Payment Information – Deposit Methods

Use extreme caution when dealing with banking information on any platform.
This is especially true when it comes to Amazon.
In short, changing your bank information without notifying Amazon can result in flagging your account, or worse, restricting your account altogether.
But why?
Modifying banking information is the first thing a hacker would do if your account became jeopardized.
So when changing your deposit method, be extra careful.
I highly recommend reading through Amazon’s help center in order to make a proper case for changing your deposit settings, and either email or talk directly to a service representative to make sure you’re taking the correct steps.
Failing to do so can potentially ruin your Amazon business.
And while it might seem overkill, taking extra time here can save you both time and money in the long run.
Are you interested in creating a self-sustaining e-commerce business through Amazon FBA, but worried about making costly mistakes with your hard-earned investment?
Click here to learn more about how my Amazon Winners Academy program has helped countless sellers earn up to $30,000 USD per month in Amazon sales without losing it all on failed products.


