After endless product research, you’ve finally sourced a winning product and now you’re ready to send your first shipment to an Amazon Warehouse.
Regardless if you’re shipping products domestically, or internationally, for example from China or India, it’s crucial to get this step correct.
And if it’s your first time selling, shipping products purchased halfway across the world can be intimidating.
In this quick guide, I break down step-by-step how to make an Amazon FBA shipping plan when moving goods into an Amazon Warehouse in 2023, assuming you’ve already listed your products on your seller central account.
| Did You Know? Some Amazon sellers ship small portions of their product to different locations first in order to inspect it and make sure it’s up to quality. This is completely fine; the choice is yours. For example, let’s say you’re shipping small electronics such as earbuds or a storage device. It could be beneficial to personally inspect the product prior to listing it on Amazon, that way you can resolve any issues with the product or packaging prior to selling. |
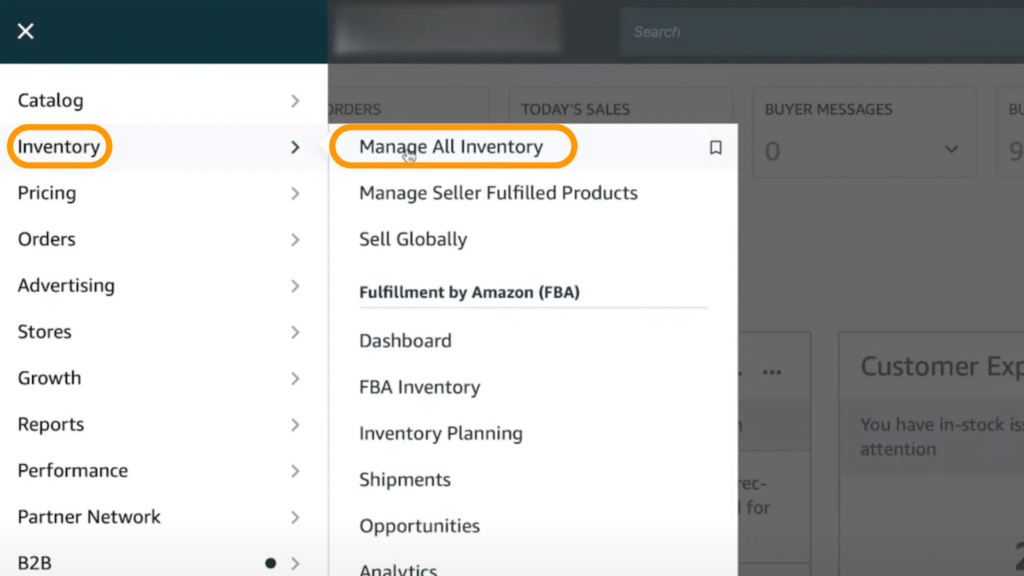
Step 1: Manage All Inventory
Sign into your Amazon Seller Central Account and Choose “Manage All Inventory.”
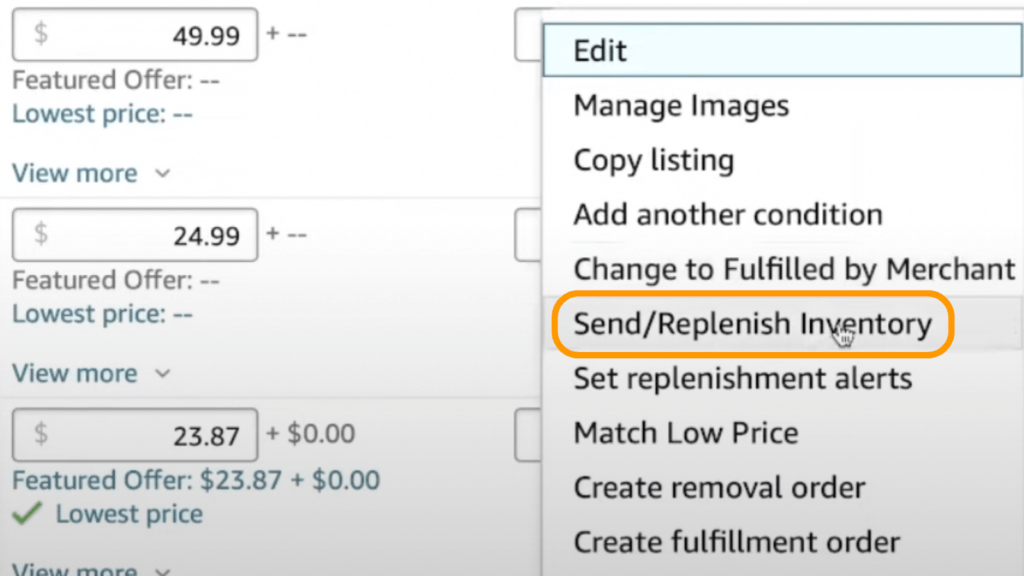
Step 2: Send/Replenish Inventory
From the drop-down edit menu, choose “Send/Replenish Inventory”
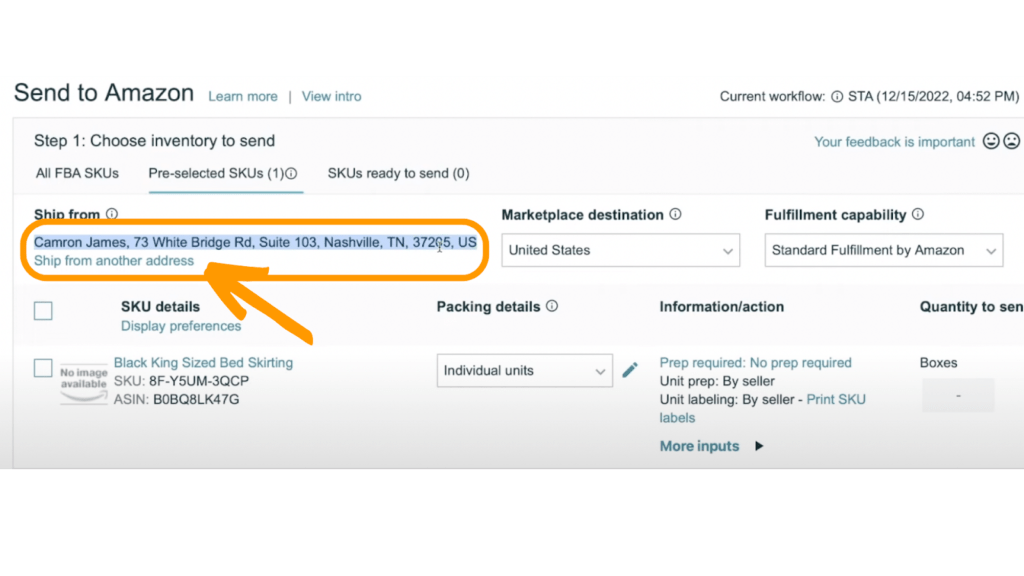
STEP 3: Choosing Your Address
- If the product is coming from your physical location, it’s fine to enter a home or business address here.
- Otherwise enter the location of your manufacturer or supplier here.
Double-check the information, especially if it’s coming from overseas.
Ideally, this information is readily available from your manufacturer (and if it’s not, consider that a red flag.)
| TIP: Check the spelling of international addresses There’s much room for error when writing the street names of businesses and locations when they’re in an unfamiliar language. |
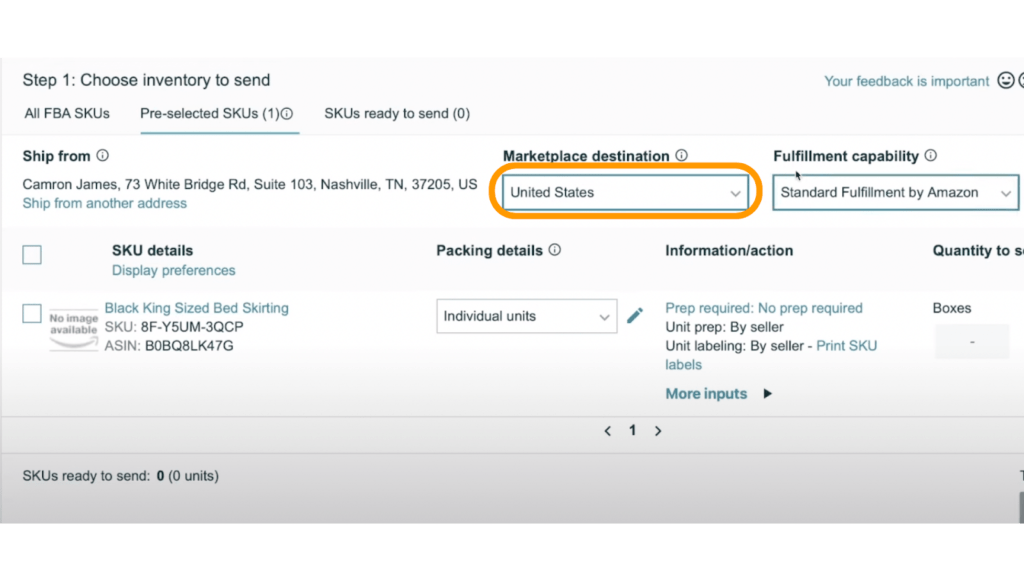
STEP 4: Marketplace Destination
Choose the market destination where customers will be buying your product.
For example, if you’re Canadian, but you’re selling in the U.S., you’ll want to choose “United States” here.
If you’re American and only selling in the Canadian Marketplace, you’ll choose “Canada”
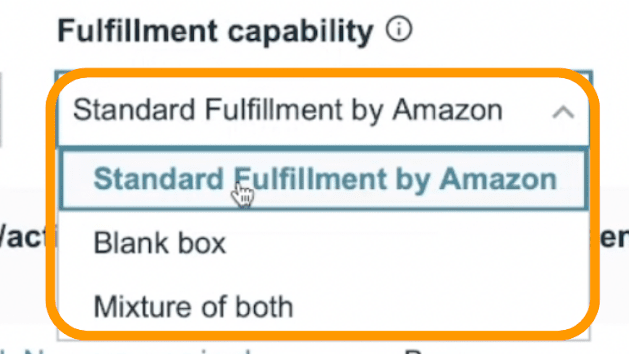
STEP 5: Fulfillment Capability
For most cases, you’ll want to choose “Standard Fulfilment by Amazon.”
However, if you’re selling across multiple channels, for example, if you own a Shopify store, this is where you’ll specify that.
But if you’re simply shipping one type of product to sell on Amazon, choose the standard fulfillment option here.
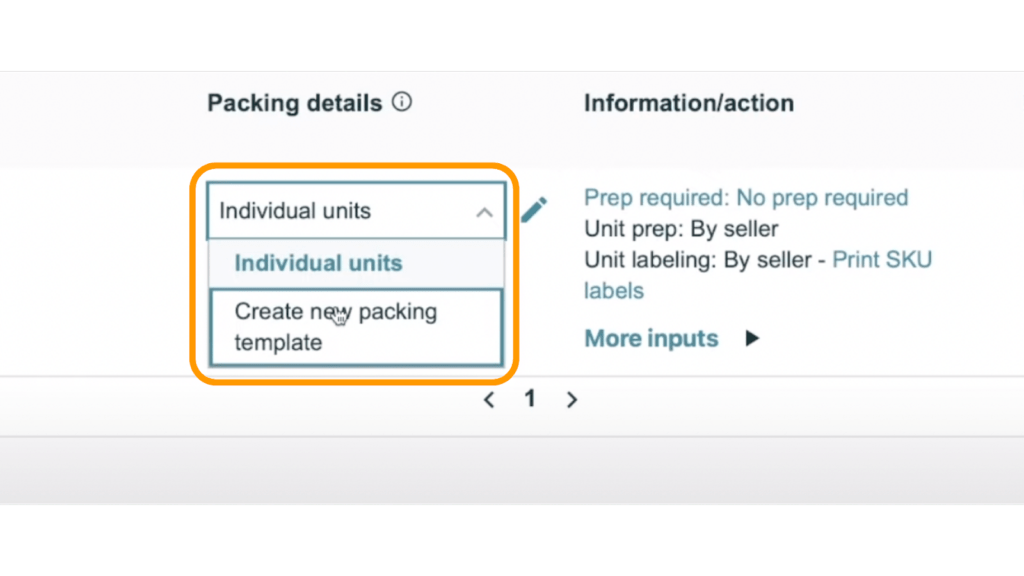
STEP 6: Packing Details
For packing details you’re given two different options.
| Individual Units | Choose this option if you’re sending in a handful of products, say 10-15. For most larger packages, or items being shipped in bulk, you likely won’t use this option. |
| Create new packing template | Because it’s typically more cost effective to buy in bulk, you’ll most likely want to choose this option. This option is used if your shipment is being sent on a master carton or if it has multiple boxes crated together. |
| AMAZON TIP: When adding/eeplenishing inventory, you can alternate between shipping in cases or pallets. If you’re new to selling, or if you’re sending in your first shipment of a new product, it’s probably best to choose a Case Pack template type. As your volume increases, and your product becomes more in demand, it may be necessary to choose Single SKU Pallet. These are typically used with larger shipments. |
STEP 7: CREATE NEW PACKING TEMPLATE
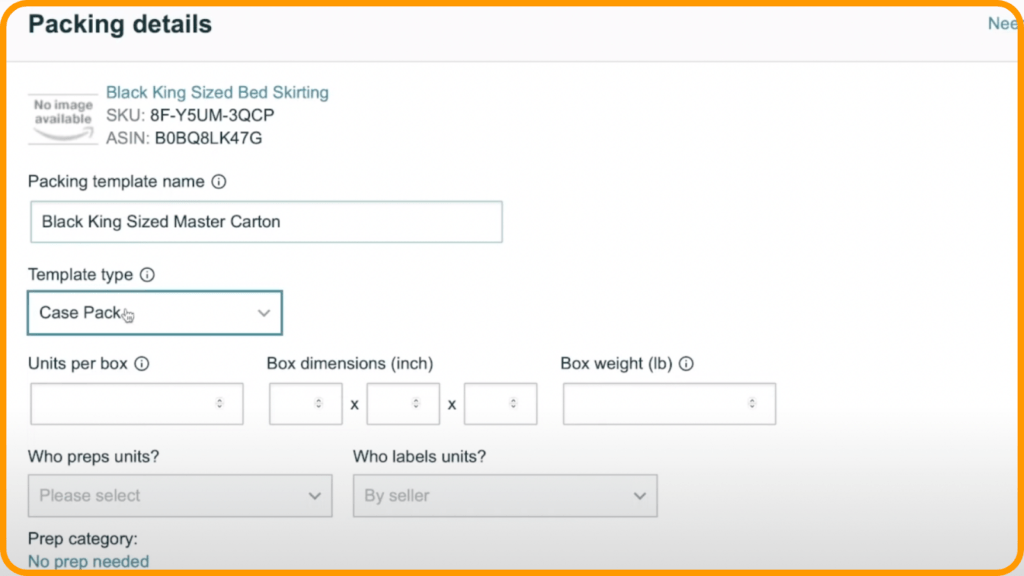
| Packing Template Name | For this example I’m using “Black King Sized Master Carton” The Master Carton is the large box your product comes shipped in, and is what is checked in at Amazon warehouses. *Note: Master cartons are NOT the same as Pallets |
| Units Per Box | Enter the amount of individual units that will be shipped. For example, if you’re shipping 20 units together in 1 master carton, enter “20” here. |
| Box Dimensions | The box dimensions here are for your master carton, or otherwise put, the BIG box that all your units come in. Do not put the box dimensions of a single unit here. *Note: Master Cartons can’t be more than 25X25X25in |
| Box Weight | Enter the weight of your master carton here. Amazon requires it to be under 50 pounds. |
| Who Preps Unit | I always recommend choosing ‘no prep needed’ here. Even if preparation is required, it’s best to leave Amazon out of this step and have your manufacturer do all the prep directed by you. |
Each product listing will have different data here, so everyone’s details will be different.
It’s best to contact your product’s manufacturer if you’re unsure about dimension, weight, etc.
STEP 8: Printing SKU Numbers
The goal of this step is to label your master cartons with the proper SKU number issues by Amazon.
You’ve got a few options here.
- You can do this yourself (if you’re actually touching the product)
Or
- Provide your manufacturer with a FNSKU number to be printed or attached to the master carton (recommended).
If you’re printing from home, you’ll need a Lazerjet printer and the correct Avery brand print labels. Both of these can be found on Amazon.
*Note here that if you allow Amazon to label cartons for you, you’ll be charged accordingly.
| Confused by UPCs and FNSKUs? Head over to YouTube, where I explain the crucial difference between the two, and a detail how to print them. |
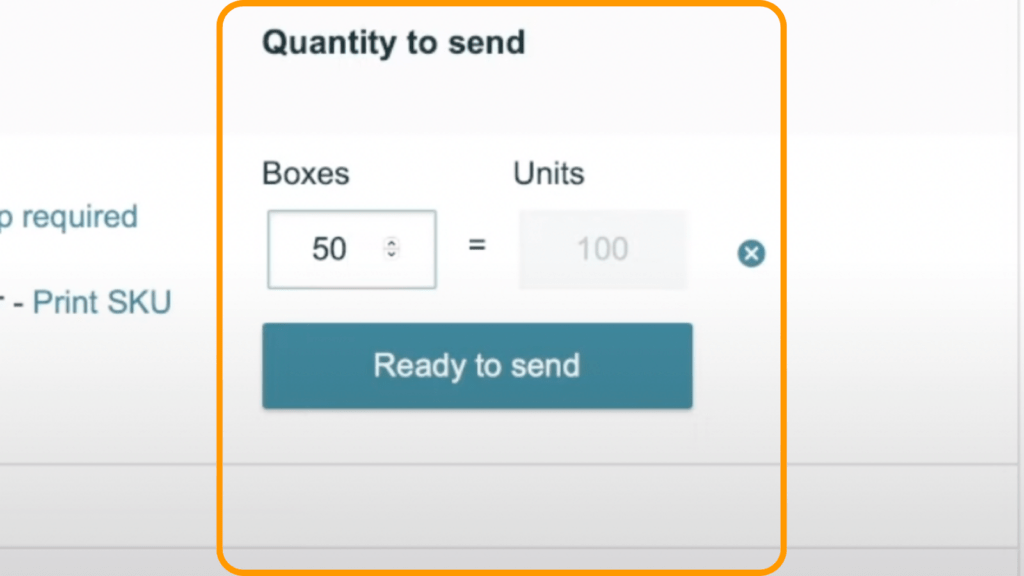
STEP 9: Quantity to Send
Your boxes and units will need to match up here. Amazon will prompt you if you need to modify information.
Obviously, $0.00 preparation and shipping costs is ideal here, but this number will be different depending on your unique situation
When you’re all set, continue to the next page.
STEP 10: Confirm Shipping
If you’re personally shipping goods into Amazon’s warehouse, enter the exact date you posted the products.
But what happens if you’re shipping internationally, and you’re unsure when the products will actually be shipped out?
Luckily, a roundabout date is just fine here.
In fact, considering the logistical challenges that sometimes occur with international shipping, it’s best to overshoot the shipment dates by a few days to provide a buffer in case shipments are late.

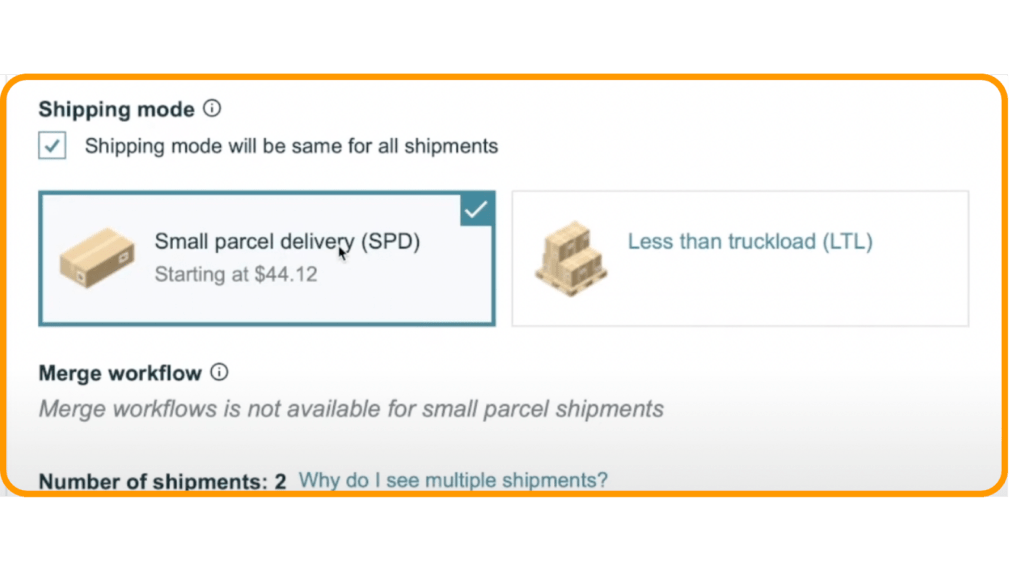
STEP 11: Small Parcel Delivery VS. Less Than a Truckload
| Small Parcel Delivery | Choose this option if you’re sending a few units or if you’re shipping in a master carton. |
| Less Than a Truckload | If your shipment is coming on a pallet, choose this option. |
STEP 12: Number of Shipments/Select Shipping Carrier
Everyone’s situation will be different across these steps.
But the main takeaway here is understanding the options for shipping using different carriers from when shipping parcels or pallets that are less than a truckload.
Small Parcel Delivery
| UPS (Amazon Partnered Carrier) | UPS offers good rates for shipping large volumes. I recommend using this option if you have physical product shipping to an Amazon warehouse. Using this method, you simply drop off your products and labels at any UPS location, and they take care of the rest. You will be charged to your Amazon account if this method is chosen. However, if you prefer a different carrier, you can choose from, FedEx or the United States Postal Service. |
Less Than a Truck Load
| If you’re shipping internationally, from a manufacturer, you likely won’t choose Amazon Preferred Carrier. Choose, ‘other’. You’ll need to communicate with your overseas manufacturer to finalize shipping details,including labeling, shipment date, etc. It’s necessary to download and provide your manufacturer with proper SKUs before they’re able to send it to an Amazon warehouse. |
In summary, if products are coming from your home, choose UPS (Preferred Amazon Carrier – rates will apply) or specify your preferred carrier.
If products are incoming from overseas, for example, China, or India, you’ll want to choose other.
| What is a Freight Forwarder? Let’s say that you’ve sourced a product from India and it’s arriving at a port in San Diego. A freight forwarding service can be used to transport the products from the port to an Amazon FBA warehouse. |
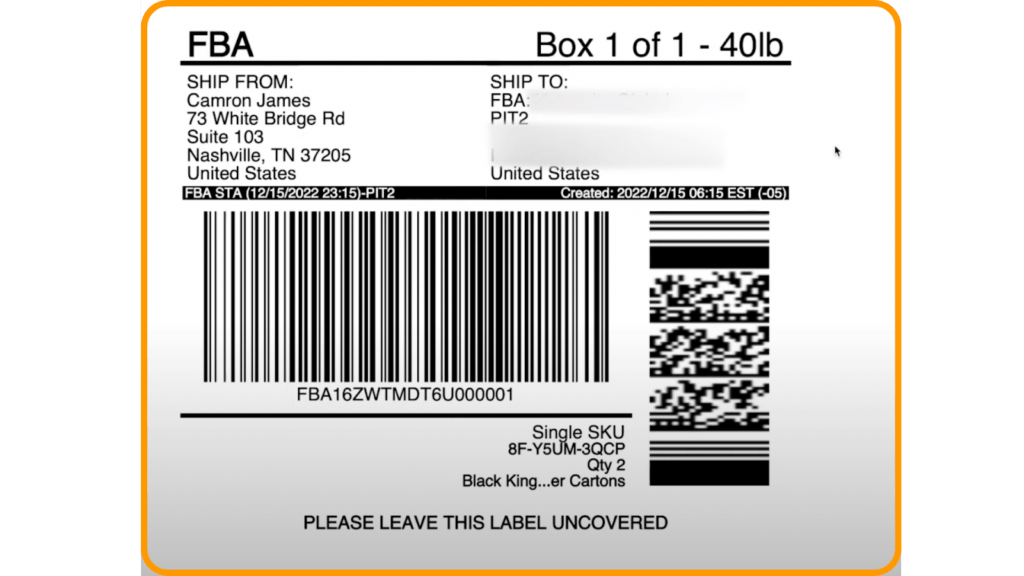
STEP 13: Attaching a SKU
When you print off your Amazon SKU number and attach it to your master carton yourself, make sure you do so with clear tape. The label’s information should be clearly visible and easily scanned.
Or
Provide your manufacturer with it so they can take care of it for you (the hands-off approach!).
STEP 14: TRACKING DETAILS
If coming from UPS, tracking information will update on its own.
Once your Amazon FBA Box # is scanned into an Amazon Warehouse, it will begin tracking for you as well.
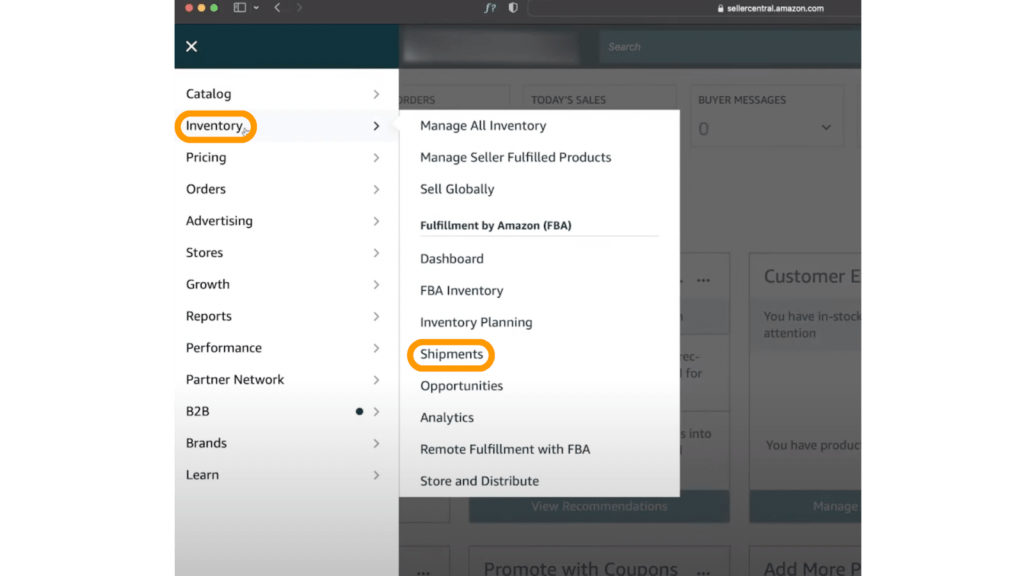
To get the most up-to-date information on shipments, go back to the main menu, and choose inventory, then shipments.
Check out the full breakdown on YouTube
Are you interested in building a $10,000 a month e-commerce business in less than 6 months?
Click here to learn more about how my Amazon Winners Academy program can help!