So you’ve made the choice to begin selling on Amazon FBA, sourced a product you’re passionate about, and now it’s time to list the product on Amazon and begin churning a profit.
But successfully listing a product is easier said than done, and mistakes made during this crucial step can be extremely difficult (if not impossible) and costly to fix down the road.
What are variations? Generic keywords? Brand Approval?
Sometimes it may feel as if you’ve bit off more than you can chew, especially when you’ve invested valuable time and resources into the business.
That’s why I’ve put together this step-by-guide to listing your first product on Amazon in FBA in 2023.
By the end of this guide, you’ll be able to confidently list products on Amazon like a pro, while avoiding common seller mistakes.
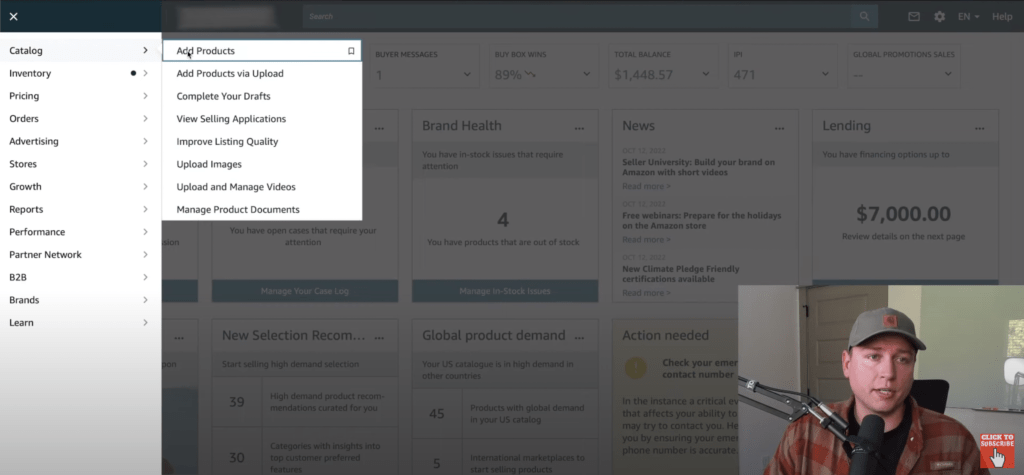
STEP 1: AMAZON FBA: Adding Products to Your Catalog
Upon signing into your Amazon Seller Central Account, choose “Catalog > Add Products.”
This screen may look slightly different depending on your location and type of account.
On the next screen, you’ll be given a few options:
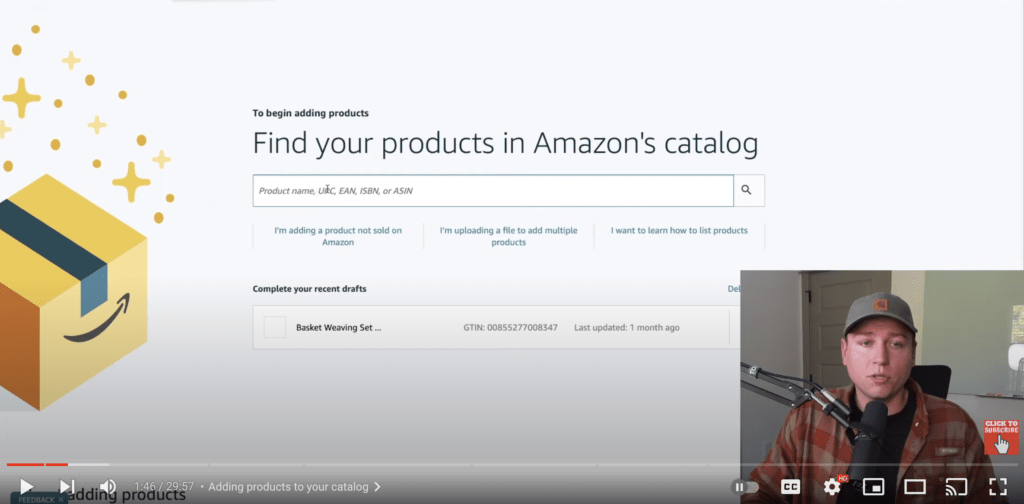
- Product name, UPC, EAN, ISBN, Or ASIN: Use this option if you’re selling wholesale, books, selling via retail arbitrage, or selling a product that already has a listing on Amazon. A full video breakdown is available here.
- I’m Adding a Product Not Sold on Amazon: This option is for sellers adding brand new products to Amazon, such as private label products, or from a personalized brand. In my experience, this is by far the most profitable option for selling on Amazon.
- I’m Uploading a File to Add Multiple Products: This is used mostly by established/large sellers with a large amount of SKUs.
- I Want to Learn How to List Products: Amazon’s resources are hit or miss in my opinion, but are generally helpful to an extent.
If you’re looking for personalized, in-depth breakdowns of all things Amazon FBA, subscribe to my YouTube channel here.
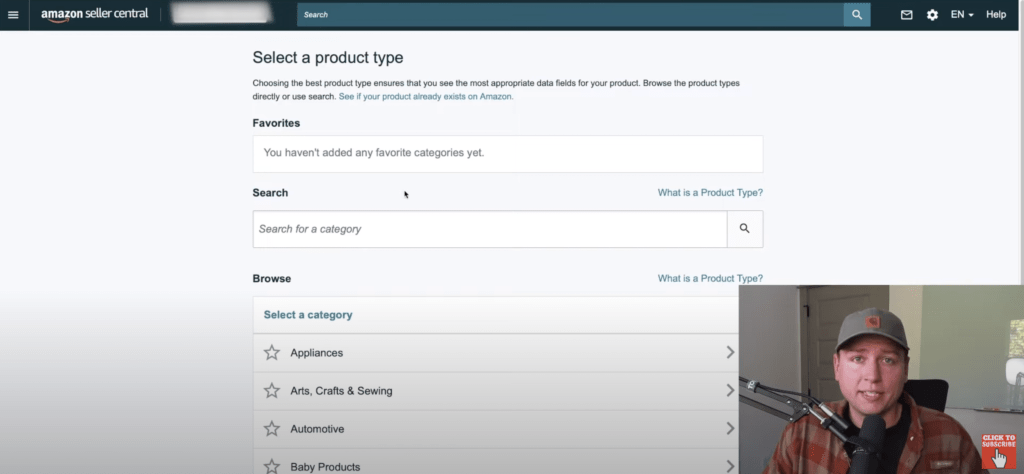
STEP 2: Adding a Product Not Sold on Amazon: Browsing Categories
In this step, you’ll want to choose the category that most closely describes your product.
It’s important to take a few minutes to examine all the options here.
While it looks self-explanatory, choosing the wrong category can hurt sales and prevent your product from gaining traction (even if you’ve done everything else correctly.)
And while this is easily fixed, spending an extra bit of time here is advised, and can reduce headaches and troubleshooting later on.
STEP 3: Product Identity
Next, you’ll be taken through a series of steps that you must complete before moving on to the next.
*Deep Breathe* We’ll get through this!
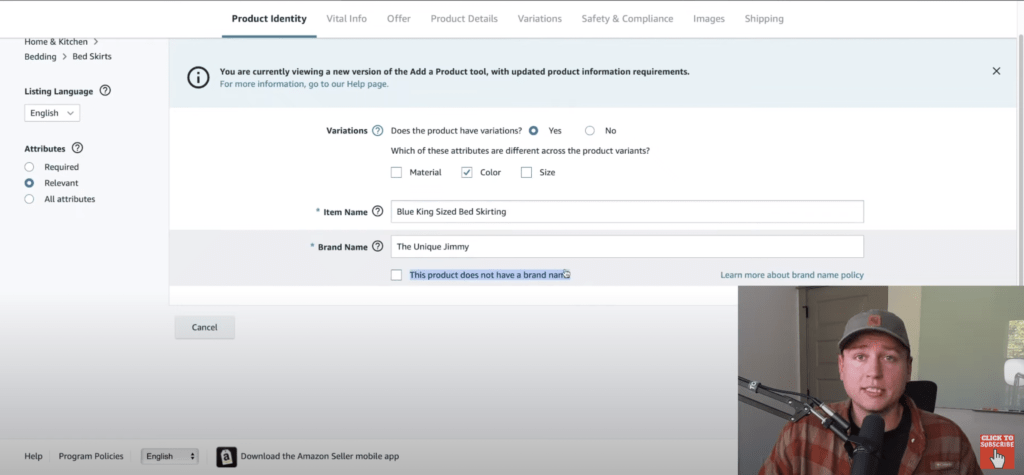
Variations: Amazon is asking if there’s any variety in the products you’re selling. Specifically color, material, and size. In most all cases, you’ll want to answer yes here. This will come in handy if you decide to add additional variations later.
When prompted to choose Color, Size, or Material, go ahead and choose the attribute you will most likely add as a variation in the future.
Item Name: This is how your product will appear on Amazon. Of course, you can always change this later, but it’s best to choose a specific and descriptive title to catch the attention of buyers.
For example, instead of listing “White Tennis Shoes Women,” a better item name might be “Extra Comfortable Women’s Tennis Shoes (White) – Casual Style with Laces”
The name can be tweaked to better reflect trends, search volume, etc.
Brand Name: Enter your brand name here. For this example I am using, “The Unique Jimmy,”If you are listing generically, check the option, This product does not have a brand name.
| ATTENTION: This Product Does Not Have a Brand Name: Choose this option if you’re listing a product generically, but take note that this cannot be undone. |
STEP 4: Vital Information
Next you’ll be prompted to enter your product’s vital information.
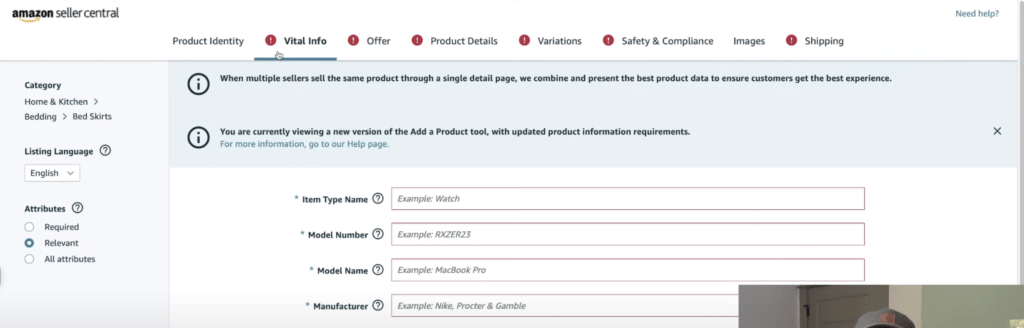
| Item Type Name | Enter a general description of your product here. This can be similar to the item name listed in the previous step. |
| Model Number | This is up to you and will vary depending on one’s inventory system, management protocol, bookkeeping, etc. For example, this can be as simple as “1” or as intricate as “BLUESHIRT0001” |
| Model Name | If selling a private label, use a generic descriptor that you can make up, and use to stay organized when selling more products down the line If selling existing brands, this will need to match the correct model name. Example: Brand: Apple, Model name: iPod Nano |
| Manufacturer | If you’re selling private labels, this will be your brand name. If for example, you’re selling Nike or Lego products (anything name-brand), enter that information here. |
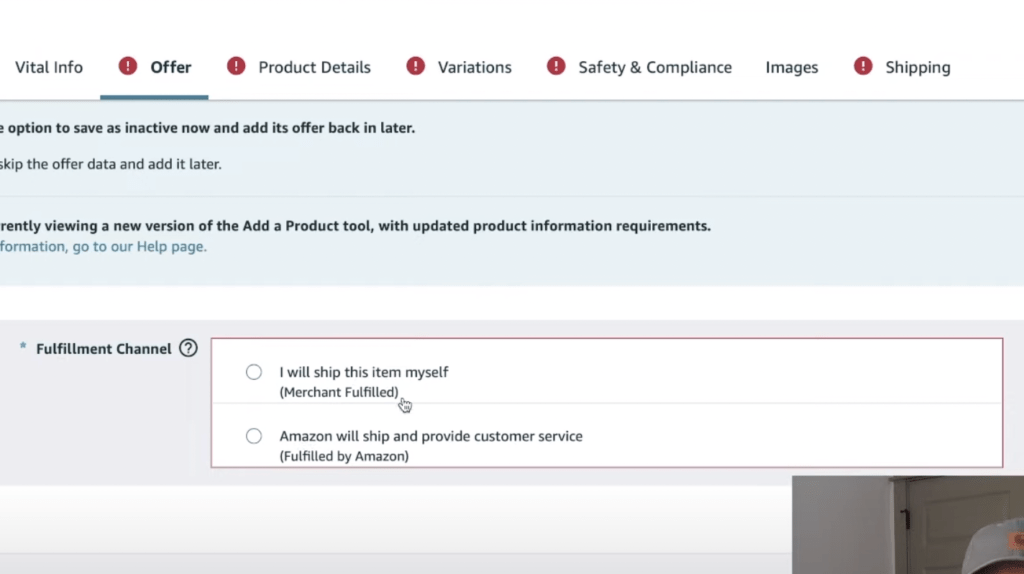
STEP 5: OFFER (AMAZON FBA VS AMAZON FBM)
At this screen you’ll be asked to choose your fulfillment channel.
It’s important here to understand the crucial difference between the two.
AMAZON FBA stands for fulfilled by Amazon. This means you’ll ship your product directly to Amazon’s Warehouse, and use Amazon’s platform to sell and ship products to customers. This is the option I recommend.
AMAZON FBM stands for fulfilled by Merchant (You). In this model, the product is shipped directly to the merchant, putting you in charge of fulfilling orders and shipment.
This option involves more logistics and time, which makes it more difficult to scale. I don’t recommend this option under most circumstances.
STEP 6: PRODUCT DETAILS:
This tab is where you’ll spend a bit extra time, as there’s a long list of input boxes.
But all of this is pretty straightforward, and some information can even be copied from previous steps.
The options will look different on each page depending on your product.
I’ve listed below the most important info to help get you started.
| Product Description | Product descriptions are vital for converting sales. They should be short, yet informative, and provide everything the customer needs to know about your product. As a general rule, product descriptions should be around a paragraph long, and provide direct value to your customer. There is some low-level HTML coding you can do to organize this with bullets and spacing. However, this is very limited these days, and Amazon continues to reduce options for this. Eventually, you will want to get A+ content where you can essentially make a mini website on your page. This will boost conversions (you will need to be brand registered for this). The good news here is that you can always change this later, and add to it as you see fit. |
| Bullet Point | Bullet points show your product’s unique advantages. They should focus on customer value. When writing bullet points, it’s important to ask yourself, “What will my customers get out of this product? What will their experience be like when they use the product? For example, let’s say I’m selling an Outdoor Gas BBQ DON’T WRITE Extra Sturdy and ALL-SEASON INSTEAD WRITE: “Entertain family and guests all year round thanks to the grill’s rugged and long-lasting construction” You can add multiple bullet points to listings. List your product’s most important attributes first. |
| Generic Keyword | Think of this as your listing’s shot at Search Engine Optimization. Enter any keywords here that might help consumers find your product. I use Helium 10, an Amazon product research app, to make sure I’m using keywords for products that are actually being searched for across the web. |
| Material | Lucky for us, there’s a drop-down menu here! |
STEP 7: VARIATIONS
In this step you’ll be prompted to enter product variations.
So if you’re selling products of multiple size, color, or material, you’ll want to provide extra attention to this step.
Effectively, each variation added will require you to input information about the item.
For example:
- Sales price
- Sales data range
- External product ID type
This step can be tedious depending on the number of variations you wish to list.
For an in-depth breakdown on this step, check out my YouTube video here
| TIP: THE EASY WAY TO GET A UPC CODE I recommend GS1.org for getting UPC codes. It’s the exact database that Amazon uses to check if you have a valid UPC code, so you are going right to the source here. |
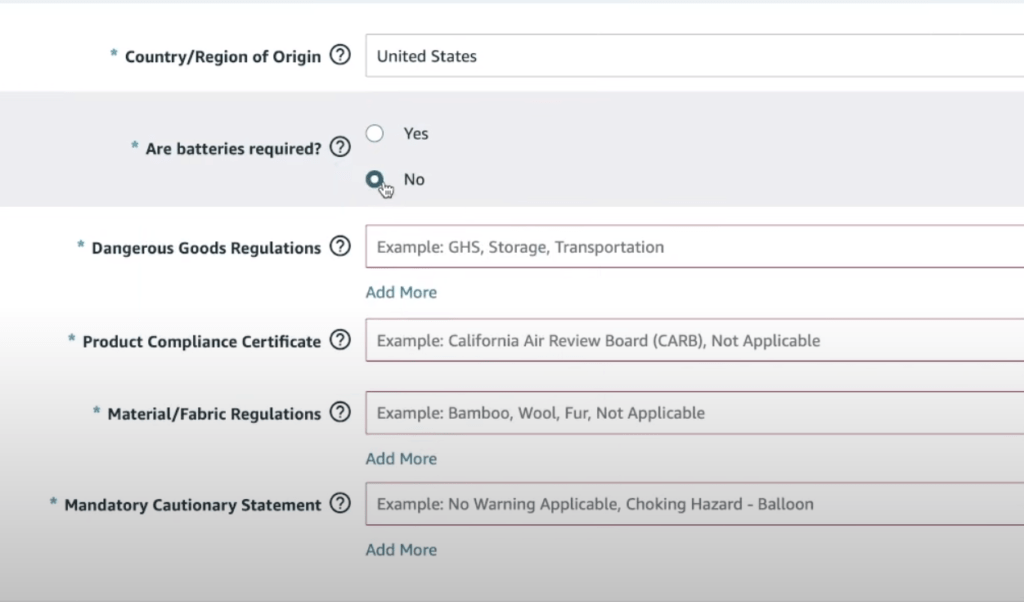
STEP 8: Safety and Compliance
Luckily this is one of the more straightforward sections.
On this page, you’re asked a few extra security questions about your products.
The important step here is the Mandatory Cautionary Statement.
A Mandatory Cautionary Statement is required for certain products that may pose health or safety risks, and is required for a large number of potential hazards.
I recommend taking extra caution here, making certain none of the options apply to your product listing.
Simple Google searches and conversations with the manufacturer can clear this up. As well as checking your competitor’s listings to see if they have any warnings that would apply to your product as well.
STEP 9: Images
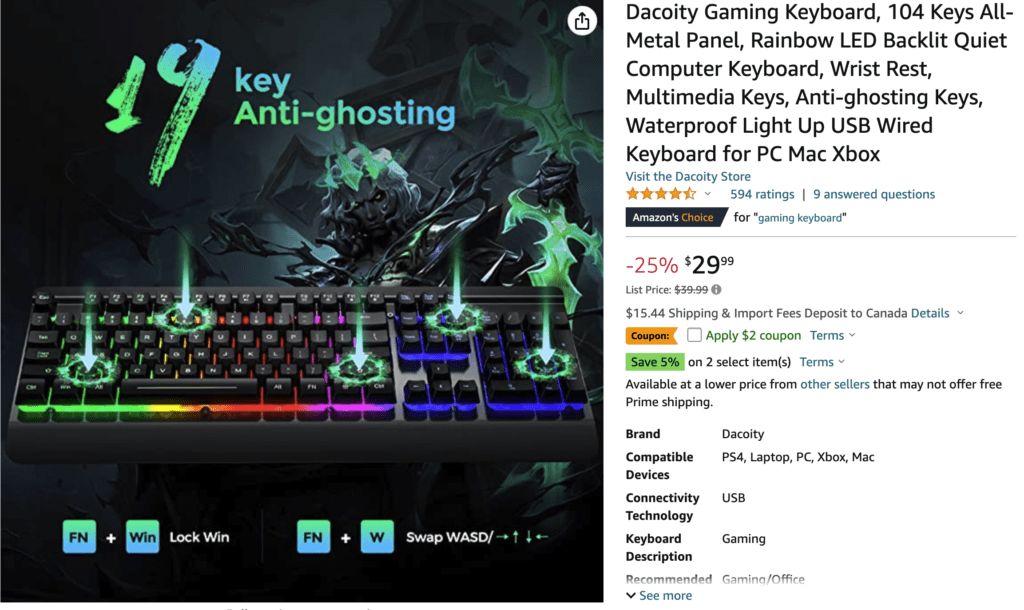
Your product’s images are the first element your customers lay eyes on, so it’s essential to make a great first impression.
But what exactly makes an image that actually converts to sales?
Start with researching your niche, and ask yourself a few important questions:
- What are your competitor’s images like?
- Are they professionally done?
- Did they use photoshop (this is sometimes a BIG no-no)
- How can I improve on them?
The goal is to top other top sellers within your niche.
There’s a fair bit of marketing know-how involved here, but getting this step right is essential.
If you’re not well versed in graphic design (such as me), you can always hire quick help on websites like Upwork and Fiverr. You can hire photography and videography through these sites as well.
It’s best to invest in the right resources here because failing to provide clear, crisp photographs will make sales impossible.
Whichever route you take, it’s vital to get this step right.
However, you aren’t actually required to upload photos upon making a listing.
Most sellers create a listing to get their FNSKU so they can provide it to their manufacturer. Images can be added later on.
STEP 10: SHIPPING
On the shipping tab you’ll be prompted to input your product’s size and dimensions.
BUT BE AWARE, this IS NOT where you input your product’s master carton size.
The tab here is for individual items only (the dimensions for one single unit).
Check with your manufacturer to determine the correct dimensions, but rest assured, a ballpark figure is okay. Amazon will eventually scan and measure each product to accurately determine size, weight, and dimensions so you’re charged appropriately.
| DID YOU KNOW: What is a Master Carton? A Master carton is a large outside box that holds goods being transported or shipped. |
STEP 11: AMAZON ERROR MESSAGE 5665
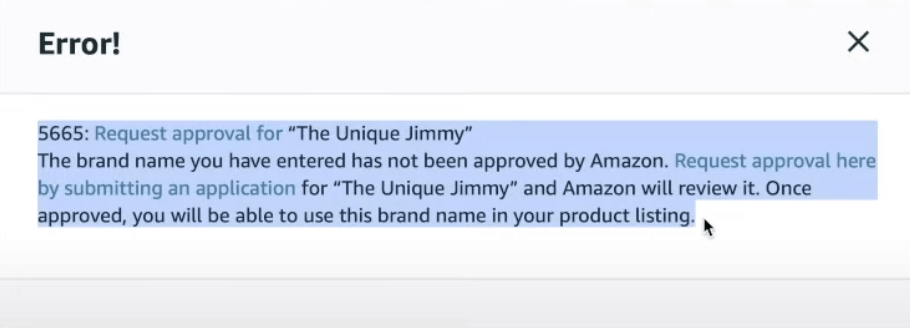
If you’re listing under a new brand name, odds are you’ll be prompted with an Amazon Error! 5665 message.
This will redirect you to the brand request approval application, where you’ll be prompted to enter information about your brand.
| Did You Know: Brand Approval Vs. Brand Registry? Brand Approval: Amazon allows for items to be listed under a specific brand name without having to register for a trademark. Brand Registry: This option is for products that have a registered trademark. Brand registry unlocks A+ Content, Video Ads, and more. |
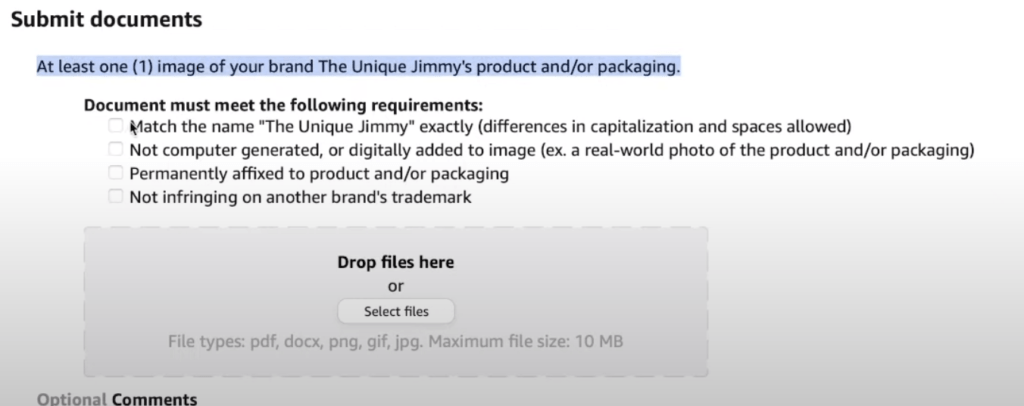
Amazon will ask for you your brand’s website, and category, as well as an image of the product and its packaging.
The final step asks for four separate criteria. These are self-explanatory, but it’s worth highlighting not to use computer-generated or photoshopped images here.
It generally takes 2-7 days for approval.
STEP 12: Getting Your FNSKU
Once approved, you’ll need to go back into the product listing (Amazon will save a draft) and complete the process.
You’ll be given an FNSKU, which is the Amazon-specific barcode that contains information about both the product and the seller.
With the FNSKU, you’ll be able to relay information to your manufacturer.
From there, it’s simply a matter of getting your goods to an Amazon warehouse, marketing your product to your target audience, and watching the sales come in.
Are you interested in learning how you can make up to $30,000 per month (in less than six months) by selling normal, everyday items on Amazon?
Click here to learn more about how my Amazon Winners Academy can help!